As a professional wire harness supplier, I’ve witnessed firsthand how crucial wire harnesses are in various electrical systems. They act as the nervous system, transmitting power and signals to different components. However, like any other part, wire harnesses can get damaged. In this blog, I’ll share my insights on how to repair a damaged wire harness, drawing from my years of experience in the industry. Wire Harness
Step 1: Identify the Damage
The first step in repairing a damaged wire harness is to accurately identify the problem area. Start by visually inspecting the wire harness. Look for signs of physical damage such as cuts, abrasions, or frayed wires. These can often be caused by sharp edges, excessive bending, or external forces.
In some cases, the damage may not be visible on the surface. Electrical issues like short – circuits or open circuits can be more challenging to detect. You can use a multimeter to test the continuity of the wires. Set the multimeter to the continuity or resistance mode and touch the probes to the ends of each wire in the harness. If the multimeter shows infinite resistance, it indicates an open circuit, meaning the wire is broken. A very low or zero resistance when there shouldn’t be can suggest a short – circuit.
Another way to identify hidden damage is through a functional test of the system that the wire harness is a part of. If a particular component isn’t working as it should, there’s a high chance that the corresponding wire in the harness is damaged.
Step 2: Gather the Necessary Tools
Once you’ve identified the damage, it’s time to gather the tools needed for the repair. Here are some essential tools:
- Wire strippers: These are used to remove the insulation from the wires. Make sure to choose the right size of wire strippers for the gauge of the wires in the harness.
- Soldering iron and solder: Soldering is a reliable way to join wires together. The soldering iron should be of an appropriate wattage, usually around 30 – 40 watts for small – gauge wires. The solder should be lead – free and have a rosin core for better electrical conductivity.
- Heat shrink tubing: This is used to insulate the repaired wires. It shrinks when heated, providing a tight and protective covering. Choose the right diameter of heat shrink tubing to fit over the repaired area.
- Electrical tape: While heat shrink tubing is preferred, electrical tape can be used as a temporary or supplementary insulation. Make sure it has good electrical insulation properties and is resistant to heat and moisture.
- Cutters or scissors: These are used to trim the wires and cut the heat shrink tubing.
Step 3: Prepare the Wires
Before making any repairs, you need to prepare the damaged wires. Start by cutting out the damaged section of the wire. Use a sharp cutter or scissors to make a clean cut. Make sure to remove enough of the damaged part to ensure that the remaining wire is in good condition.
Next, strip the insulation from the ends of the wires that you’ll be joining. Use the wire strippers to carefully remove about 1/4 to 1/2 inch of insulation, depending on the size of the wire. Be careful not to nick or cut the wire strands while stripping the insulation.
Step 4: Splice the Wires
There are several methods to splice wires, but soldering is one of the most reliable. Here’s how to do it:
- First, twist the exposed wire strands of the two wires that you want to join together. Make sure the twist is tight and the strands are evenly distributed.
- Heat the soldering iron until it reaches the appropriate temperature. Touch the tip of the soldering iron to the twisted wire strands. Once the wires are hot enough, apply the solder to the joint. The solder should flow smoothly and evenly around the wire strands, creating a solid connection.
- Avoid over – soldering, as this can create a brittle joint. Also, make sure there are no solder bridges between adjacent wires, as this can cause short – circuits.
If you don’t want to use soldering, you can also use wire connectors. There are different types of wire connectors available, such as crimp connectors. To use a crimp connector, insert the stripped wires into the connector and use a crimping tool to compress the connector onto the wires.
Step 5: Insulate the Repaired Area
After splicing the wires, it’s crucial to insulate the repaired area to prevent short – circuits and protect the wires from moisture and other environmental factors.
- If you’re using heat shrink tubing, slide the appropriate size of tubing over one of the wires before making the splice. After splicing the wires, position the tubing over the joint. Use a heat gun to apply heat to the tubing. The tubing will shrink and tightly wrap around the joint. Make sure to heat the tubing evenly to ensure a proper seal.
- If you’re using electrical tape, start by wrapping the tape tightly around the joint. Make sure to overlap the tape as you wrap it to provide complete coverage. Wrap the tape over the insulation of the adjacent wires as well to create a secure and continuous insulation.
Step 6: Test the Repaired Wire Harness
Once the repair is complete and the insulation is in place, it’s time to test the wire harness. Use the multimeter again to check the continuity of the repaired wires. Make sure that the electrical connection is good and there are no short – circuits.
You can also perform a functional test of the system that the wire harness is a part of. Turn on the power and check if all the components are working properly. If there are still issues, double – check your repair and look for any other potential problems in the harness.
When to Replace Instead of Repair
In some cases, it may be more practical to replace the entire wire harness instead of repairing it. Here are some situations where replacement is a better option:
- Extensive damage: If the wire harness has multiple damaged sections or if a large portion of the harness is affected, it may be difficult and time – consuming to repair each individual wire. Replacing the harness will ensure a reliable and long – lasting solution.
- Outdated harness: If the wire harness is old and has been in use for a long time, it may be more prone to future failures. Replacing it with a new harness can improve the overall performance and safety of the electrical system.
- Lack of components: If the damage is to a specialized wire or connector that is difficult to source, it may be more cost – effective to replace the entire harness.
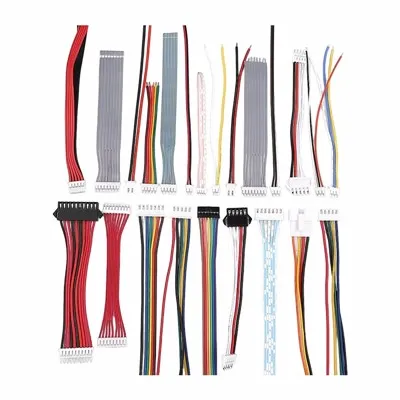
As a wire harness supplier, I understand that choosing the right wire harness for your needs is just as important as knowing how to repair it. Our extensive range of wire harnesses is designed to meet the highest quality standards, ensuring reliable performance in various applications. Whether you need a simple wire harness for a small electronic device or a complex one for an industrial machine, we have the expertise and the products to fulfill your requirements.
If you’re a manufacturer or an installer in need of high – quality wire harnesses, or if you have any questions about wire harness repair or selection, I invite you to contact us for a procurement discussion. Our team of experts is ready to assist you in finding the best solution for your specific needs.
Rigid PCB References:
- "Electrical Wiring Handbook" by McGraw – Hill Education
- "Automotive Electrical Systems" by Delmar Cengage Learning
Huaswin Electronics Technology Co., Ltd.
With abundant experience, we are one of the most professional wire harness manufacturers and suppliers in China. Welcome to wholesale customized wire harness at competitive price from our factory. If you have any enquiry about pricelist, please feel free to email us.
Address: Building A2, Hao Hai Hong Industrial Park, No.3 Yu He Road, Gong He, Sha Jing, Bao An, Shenzhen
E-mail: sales@huaswin.com
WebSite: https://www.huaswin-pcba.com/
